How to add a client
1
Go to Clients
Navigate to Clients in the sidebar.
2
Click 'Add Client'
Click the + Add Client button in the top right corner.
3
Fill in client details
Enter the client’s information: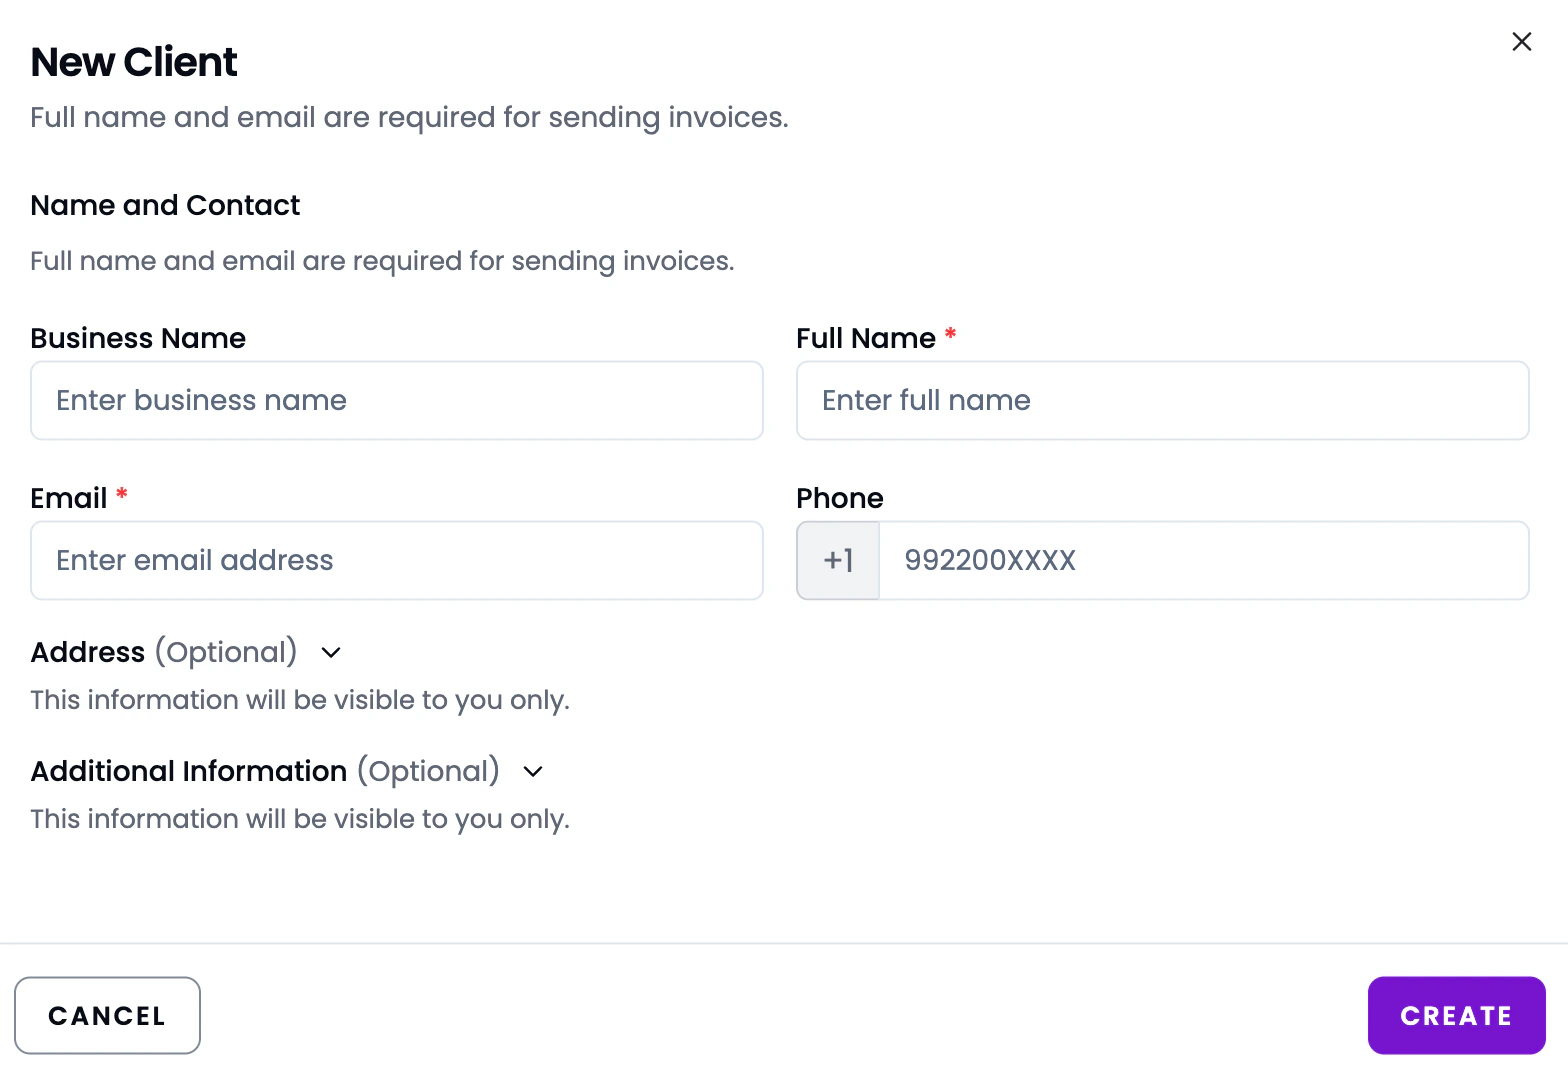
4
Save
Click Save. The client is now available when creating invoices.
Managing clients
Click the three-dot menu next to any client in the Clients list to:
- Edit - update client details
- View - see client profile and full invoice history
- Delete - remove a client if they’re no longer active (existing invoices are preserved)
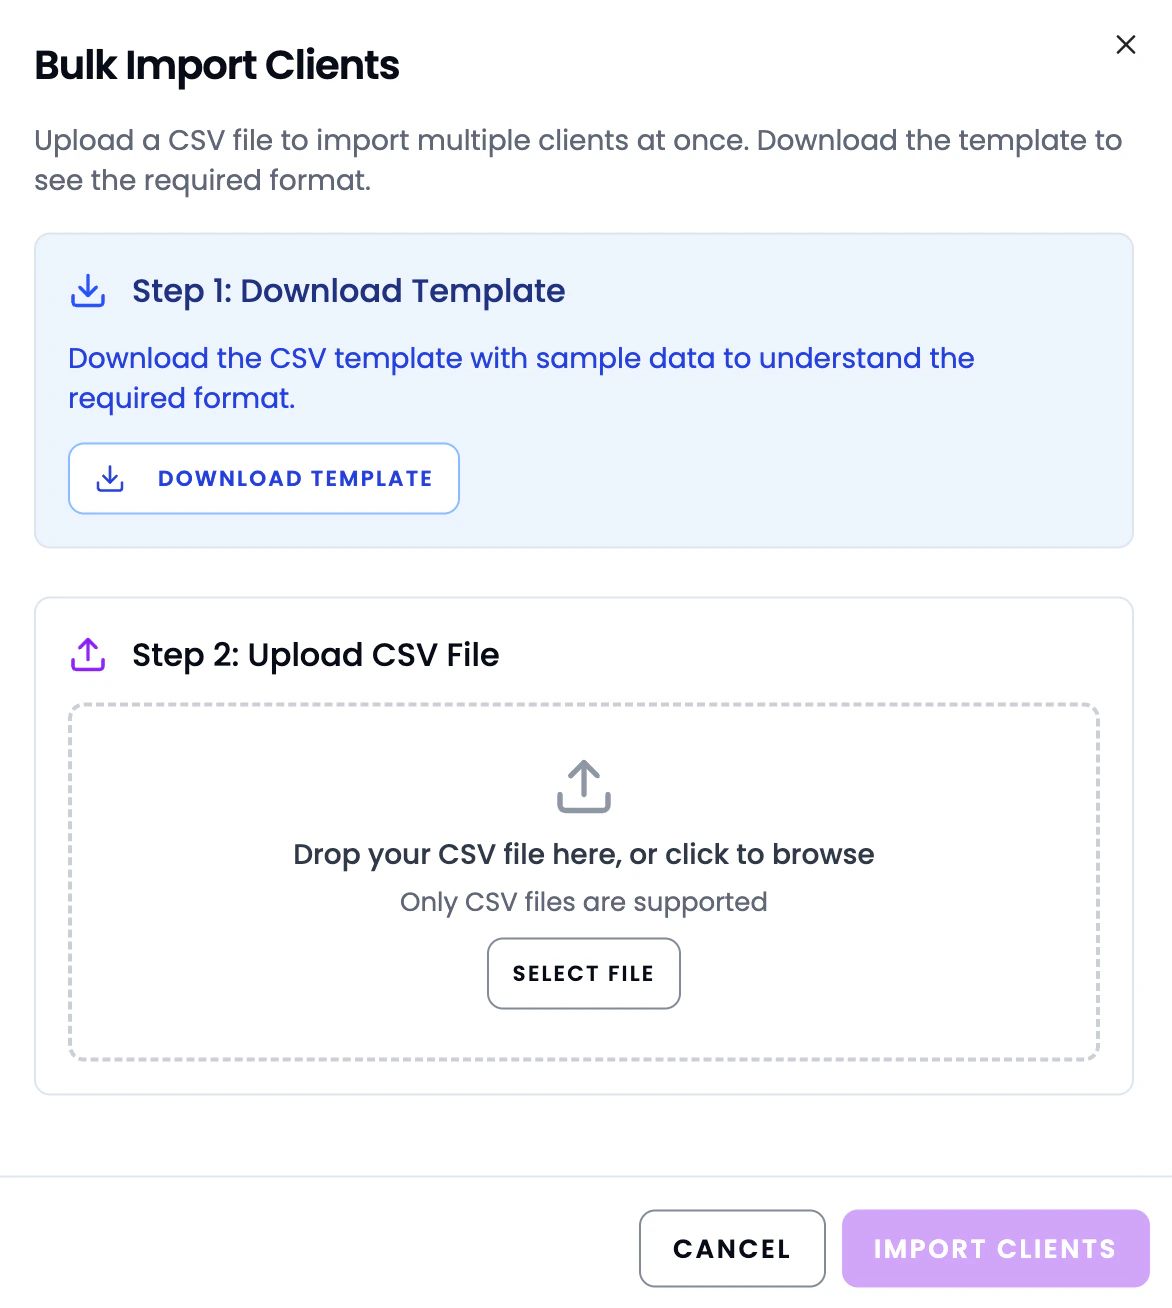
Bulk Import Clients
Import multiple clients at once using a CSV file. How to bulk import:- Go to Clients and click Bulk Import at the top right
- Step 1: Download Template — click Download Template to get a CSV file with sample data and the required format
- Step 2: Upload CSV File — fill in the template with your client data, then drag and drop it into the upload area or click Select File to browse (CSV only)
- Click Import Clients to add all clients at once