> ## Documentation Index
> Fetch the complete documentation index at: https://cashflowy.ai/docs/llms.txt
> Use this file to discover all available pages before exploring further.
# Add a Client
> Add and manage your clients in Cashflowy so you can send them invoices.
Before you can send an invoice, you need to add the client to Cashflowy. Client information is saved and reused across all future invoices.
## How to add a client
Navigate to Clients in the sidebar.
Click the **+ Add Client** button in the top right corner.
Enter the client's information:
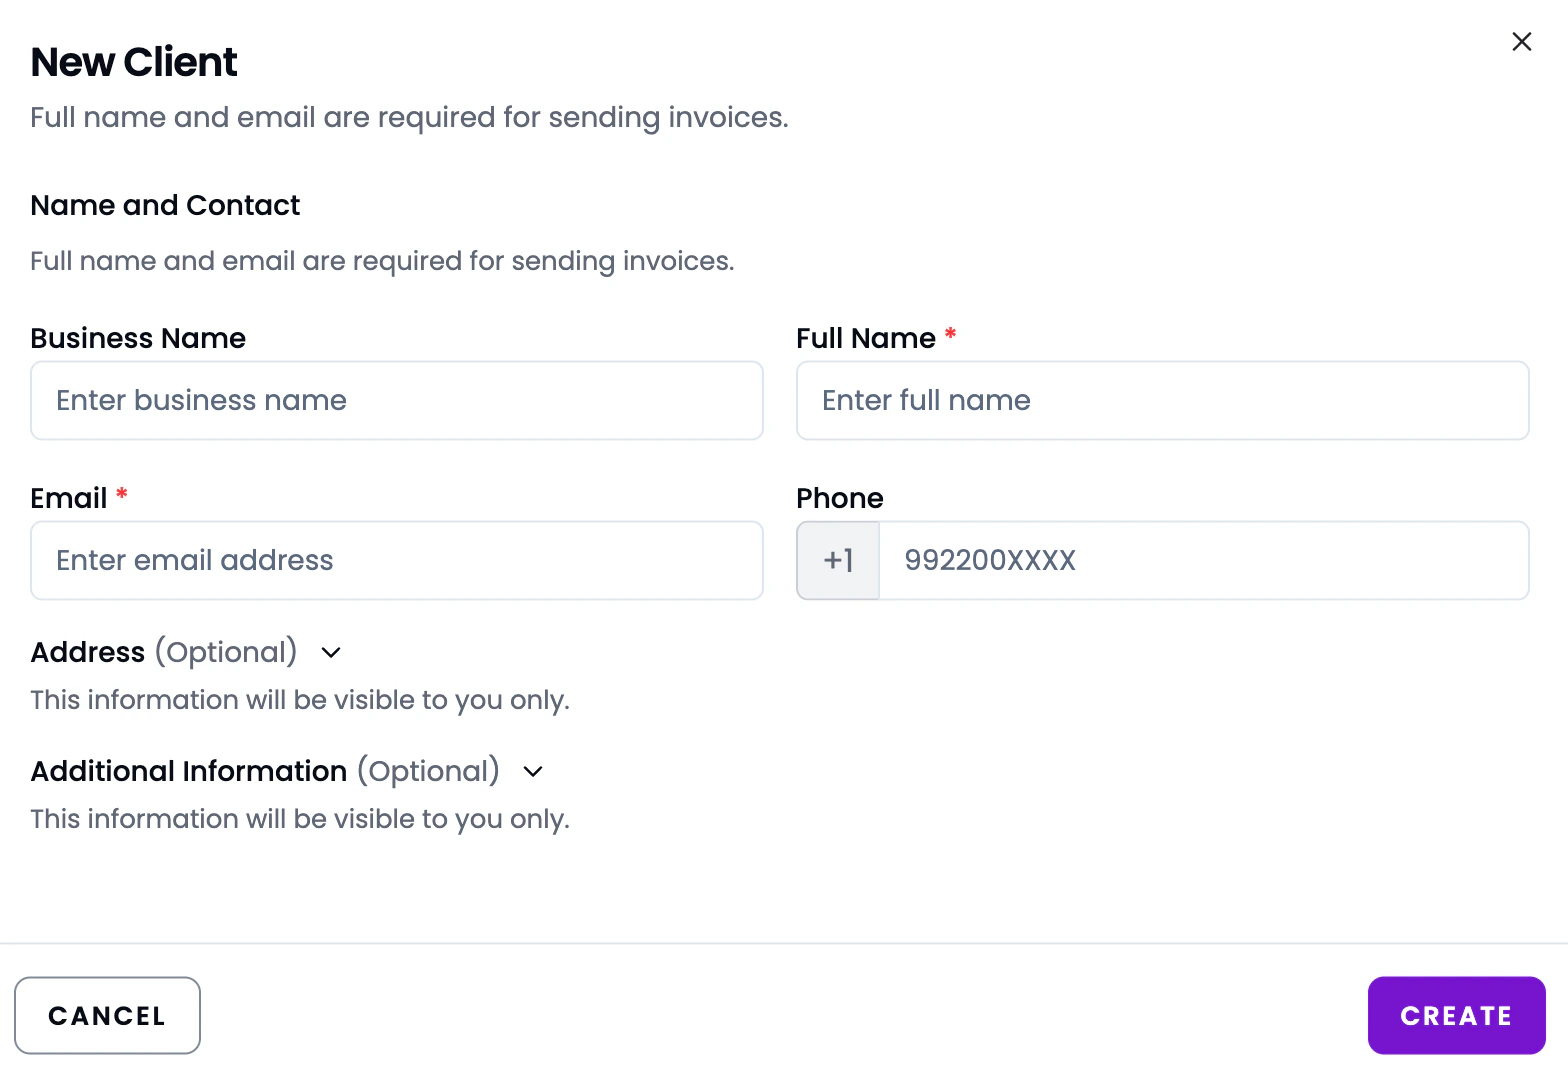 | Field | Required? | Description |
| :--------------------- | :-------- | :---------------------------------------------------- |
| Business Name | No | Company or organization name |
| Full Name | Yes | Client's full name |
| Email | Yes | Primary email for invoices |
| Phone | No | Contact number (US format, +1 prefix) |
| Address | No | Billing address (visible to you only) |
| Additional Information | No | Internal notes about the client (visible to you only) |
Click **Save**. The client is now available when creating invoices.
## Managing clients
Click the **three-dot menu** next to any client in the Clients list to:
| Field | Required? | Description |
| :--------------------- | :-------- | :---------------------------------------------------- |
| Business Name | No | Company or organization name |
| Full Name | Yes | Client's full name |
| Email | Yes | Primary email for invoices |
| Phone | No | Contact number (US format, +1 prefix) |
| Address | No | Billing address (visible to you only) |
| Additional Information | No | Internal notes about the client (visible to you only) |
Click **Save**. The client is now available when creating invoices.
## Managing clients
Click the **three-dot menu** next to any client in the Clients list to:
 * **Edit** - update client details
* **View** - see client profile and full invoice history
* **Delete** - remove a client if they're no longer active (existing invoices are preserved)
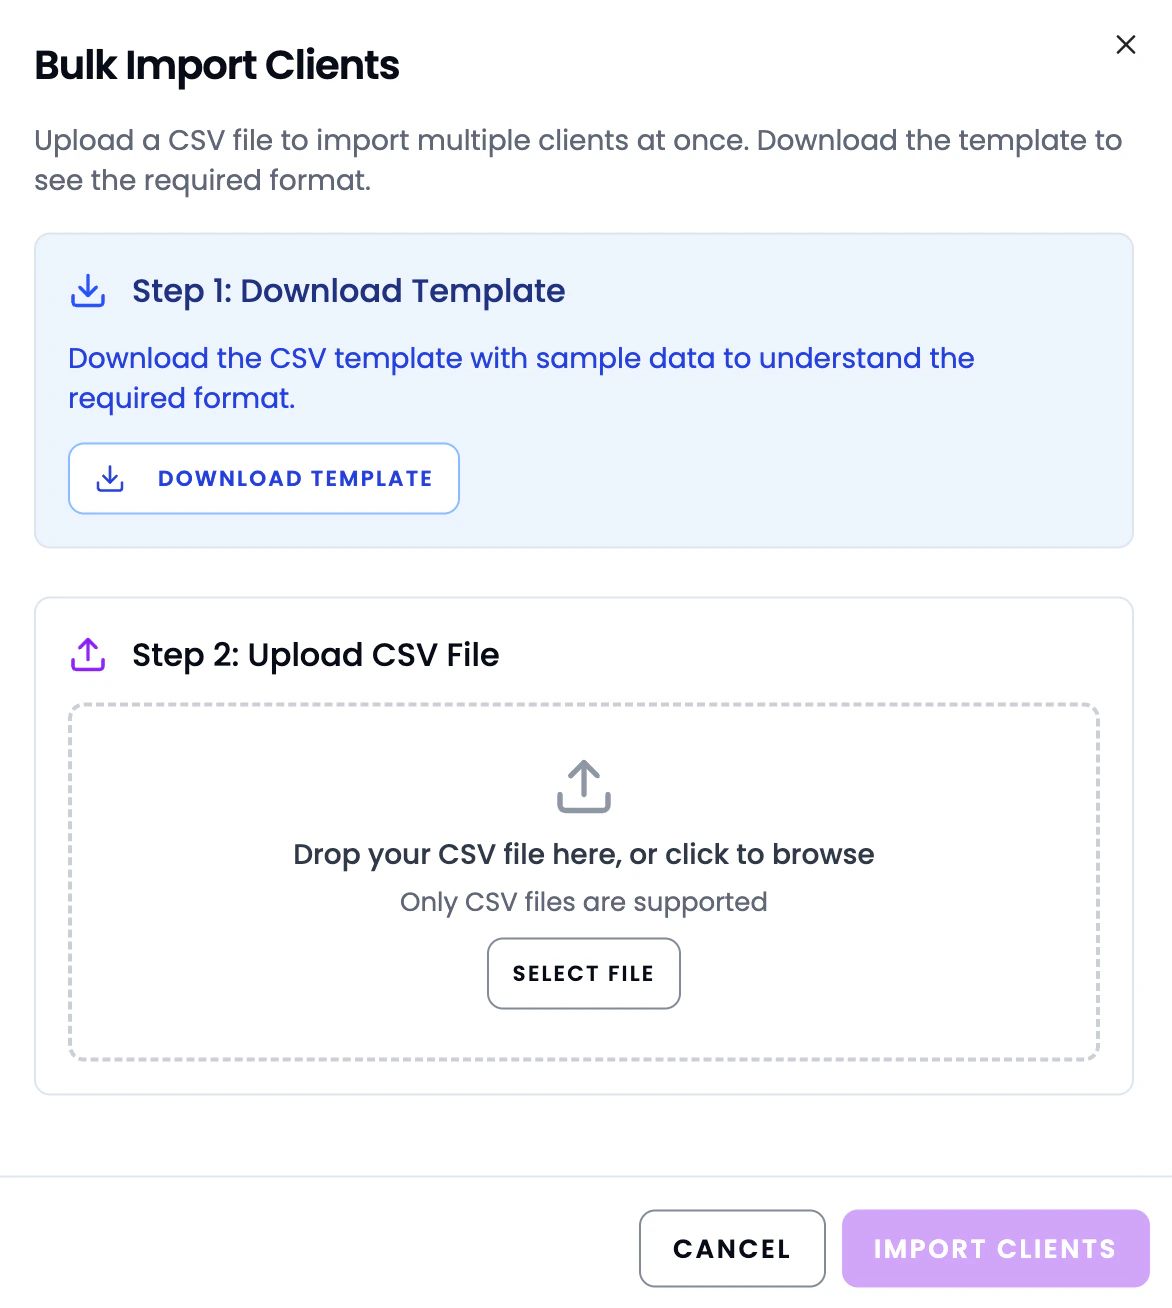
## Bulk Import Clients
Import multiple clients at once using a CSV file.
**How to bulk import:**
1. Go to **Clients** and click **Bulk Import** at the top right
2. **Step 1: Download Template** — click **Download Template** to get a CSV file with sample data and the required format
3. **Step 2: Upload CSV File** — fill in the template with your client data, then drag and drop it into the upload area or click **Select File** to browse (CSV only)
4. Click **Import Clients** to add all clients at once
* **Edit** - update client details
* **View** - see client profile and full invoice history
* **Delete** - remove a client if they're no longer active (existing invoices are preserved)
## Bulk Import Clients
Import multiple clients at once using a CSV file.
**How to bulk import:**
1. Go to **Clients** and click **Bulk Import** at the top right
2. **Step 1: Download Template** — click **Download Template** to get a CSV file with sample data and the required format
3. **Step 2: Upload CSV File** — fill in the template with your client data, then drag and drop it into the upload area or click **Select File** to browse (CSV only)
4. Click **Import Clients** to add all clients at once
 **Tip:** Use the downloaded template as-is to avoid format errors. All required fields (Full Name, Email) must be filled in for each row.
**Add all your regular clients upfront.** This saves time when creating invoices later — just select from the dropdown instead of entering details each time.
**Tip:** Use the downloaded template as-is to avoid format errors. All required fields (Full Name, Email) must be filled in for each row.
**Add all your regular clients upfront.** This saves time when creating invoices later — just select from the dropdown instead of entering details each time.